

I’ve been posting a lot about psychology and the nervous system lately, so I thought I’d switch gears for a bit.
One of my favorite things about herbalism is learning the plants that grow all around us. Elderberry season is one I look forward to every year because Justin has several elderberry trees in his yard, so we usually end up with more berries than we know what to do with. Most of mine get dried for tea, and every now and then I’ll make a batch of elderberry syrup to keep on hand through the winter.
Before I share the syrup recipe I use, I thought it would be fun to teach you how I identify elderberry in the field.
These are all photos that I took this morning from Justin’s elderberry tree. Isn’t it just beautiful?😊
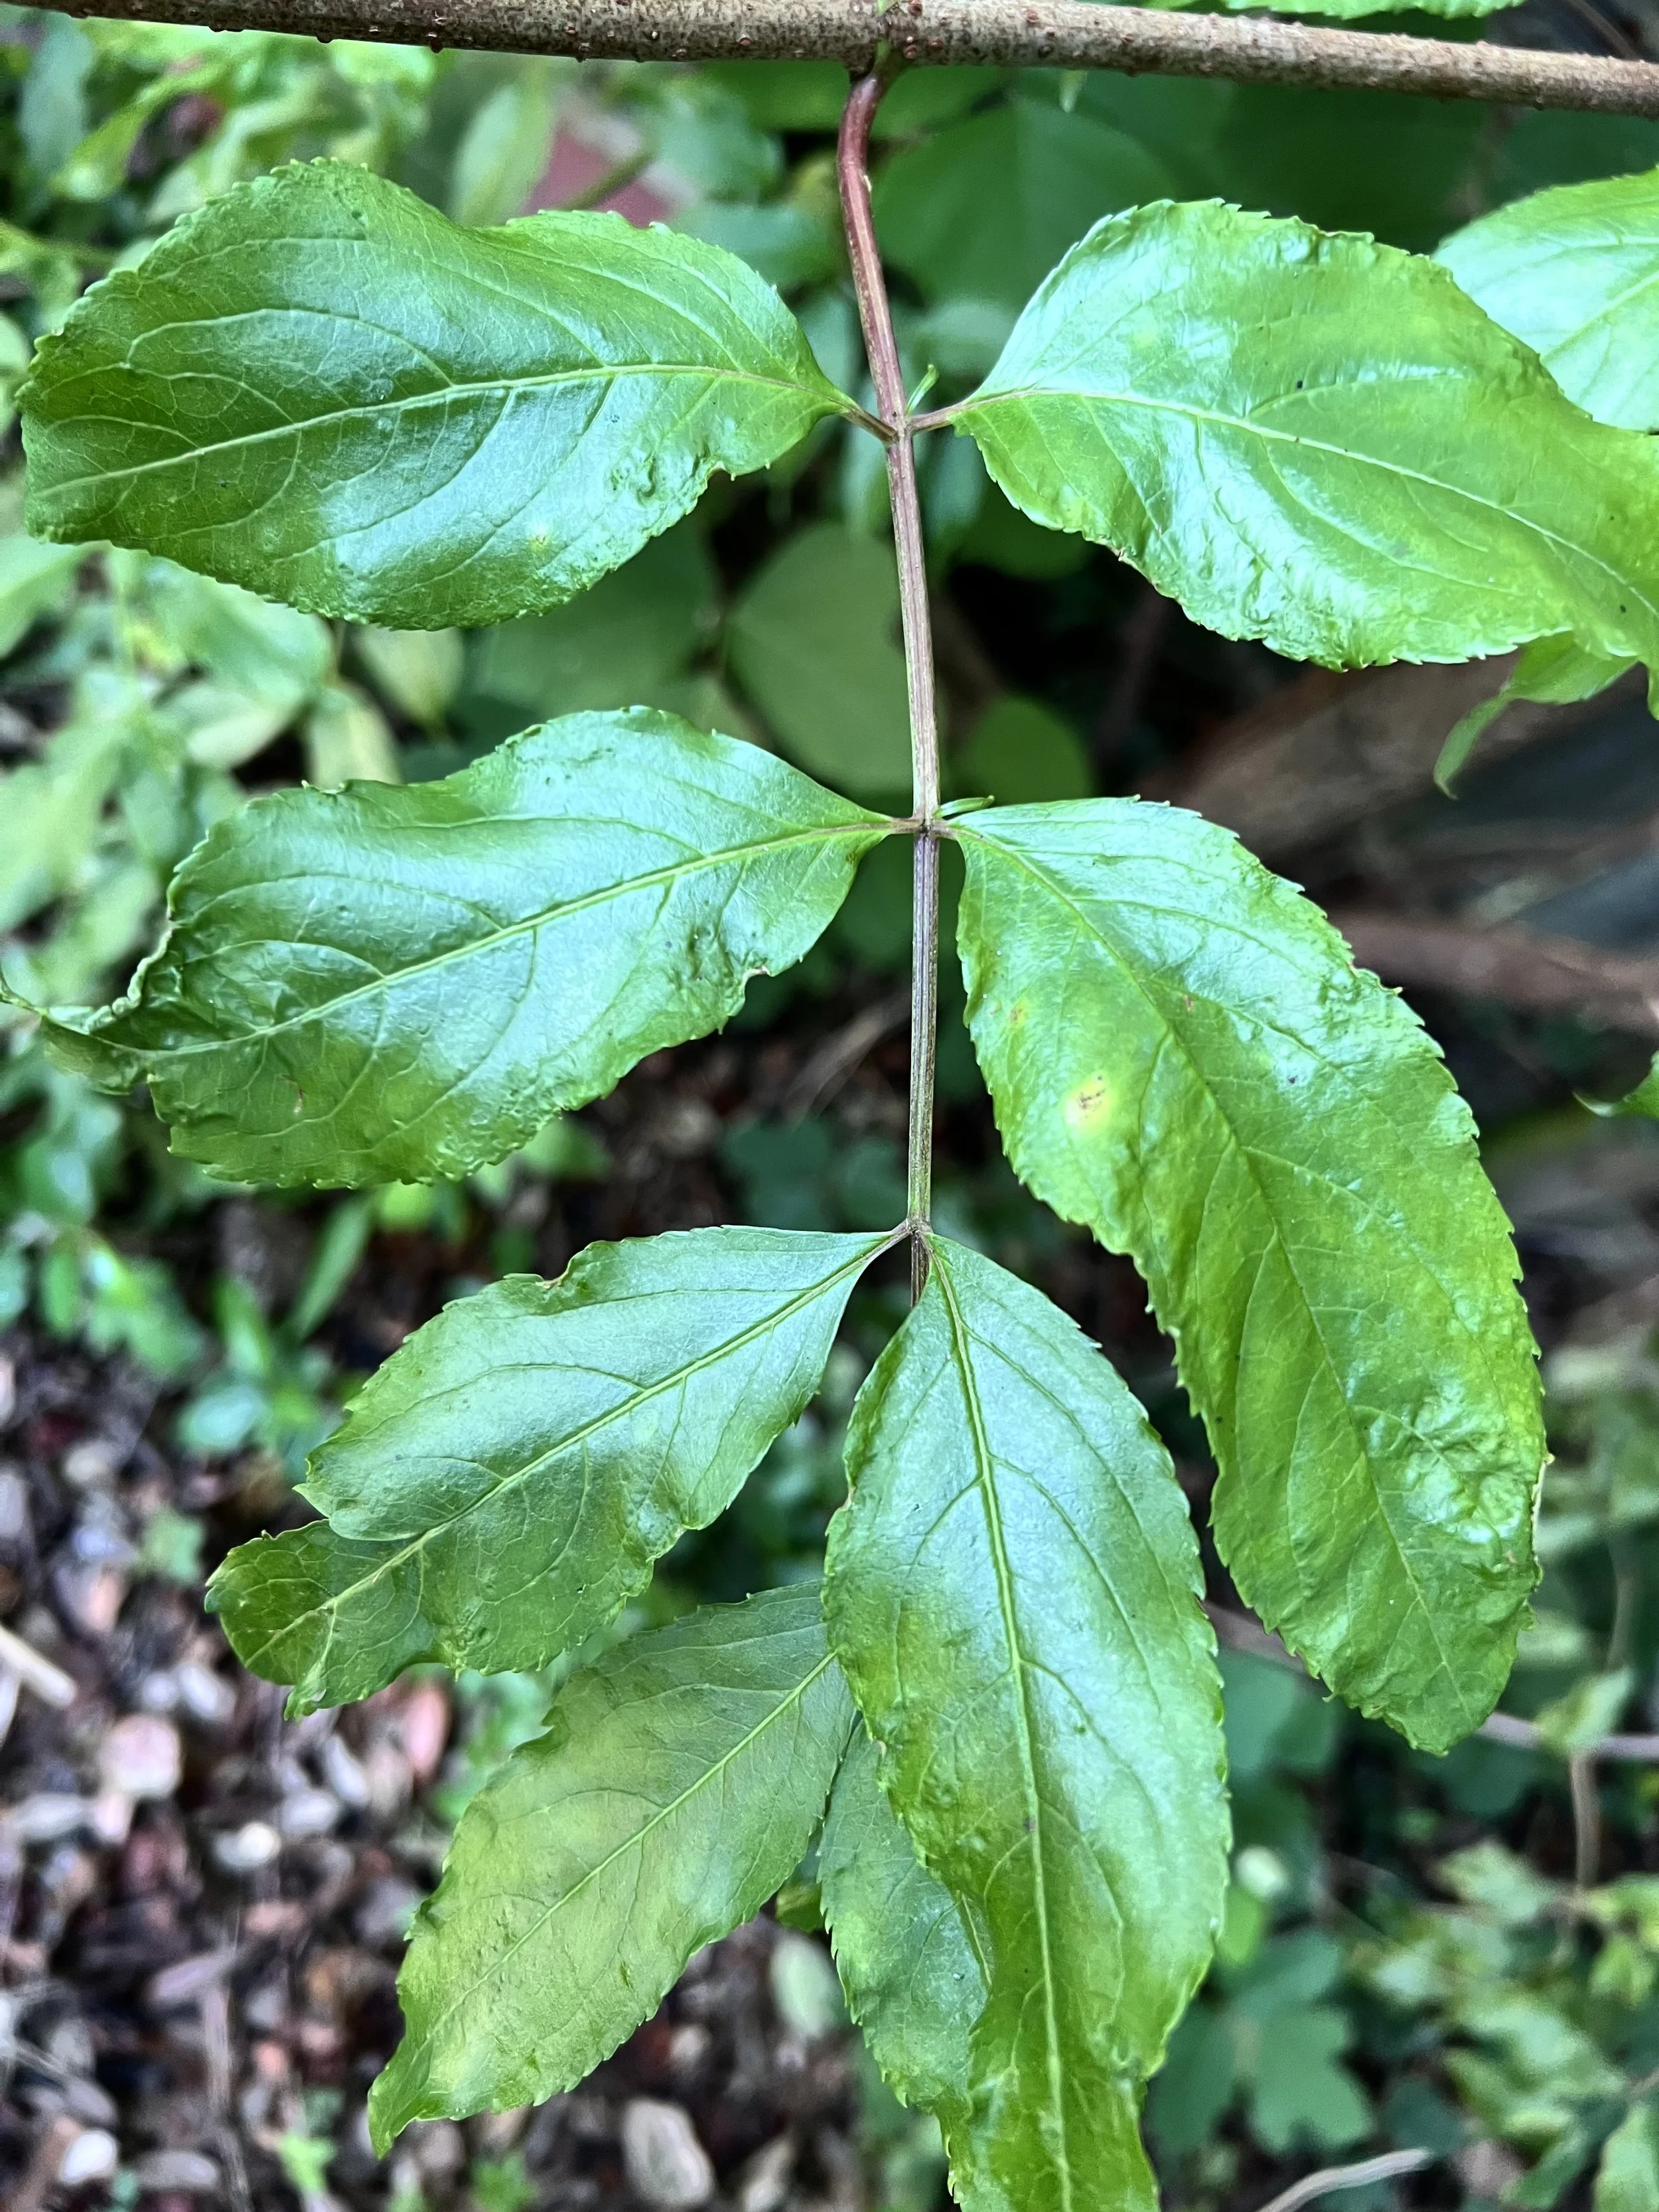
Elderberry has compound leaves, which means what looks like one leaf is actually made up of several smaller leaflets growing along one stem. The leaflets grow opposite each other, have finely toothed edges, and come to a nice point. Once you start looking for this pattern, it becomes pretty easy to recognize.
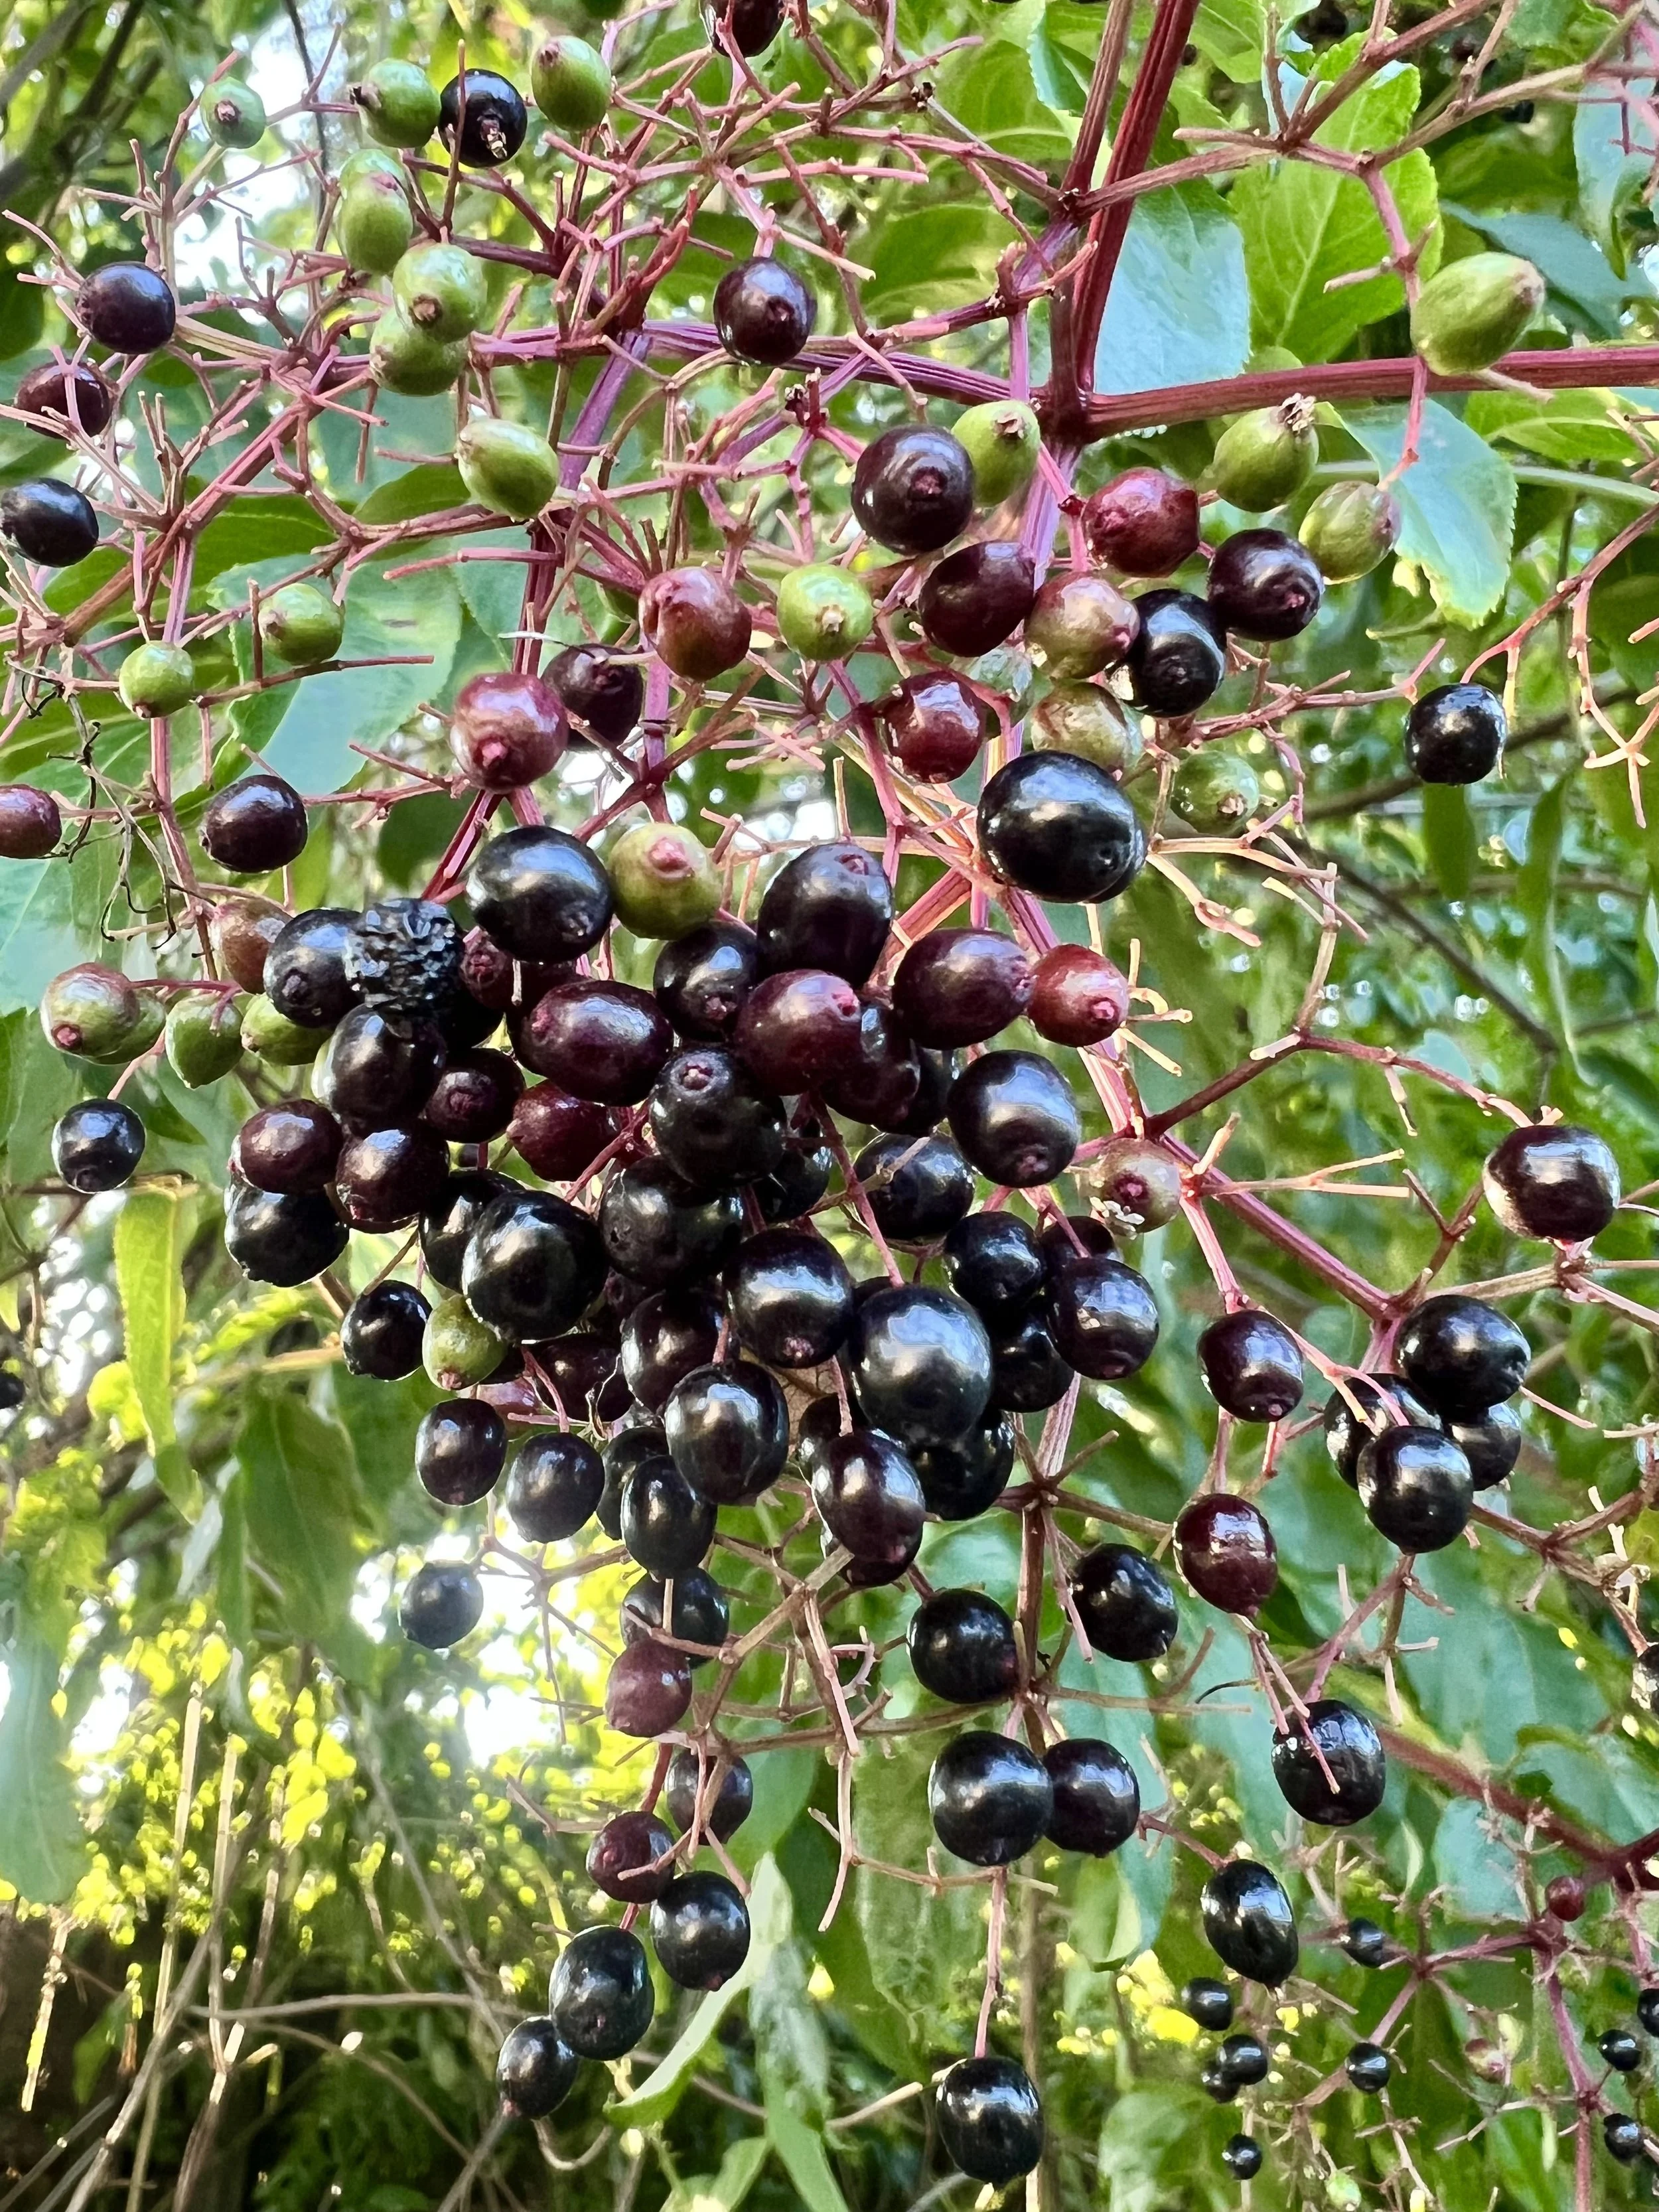
The berries grow in large clusters and don’t all ripen at exactly the same time. You’ll usually see green, red, purple, and black berries all on the same cluster. I wait until most of them have turned that deep purple, almost black color before harvesting. Notice the reddish-purple stems holding the berries. That’s another characteristic I look for when I’m identifying elderberry.
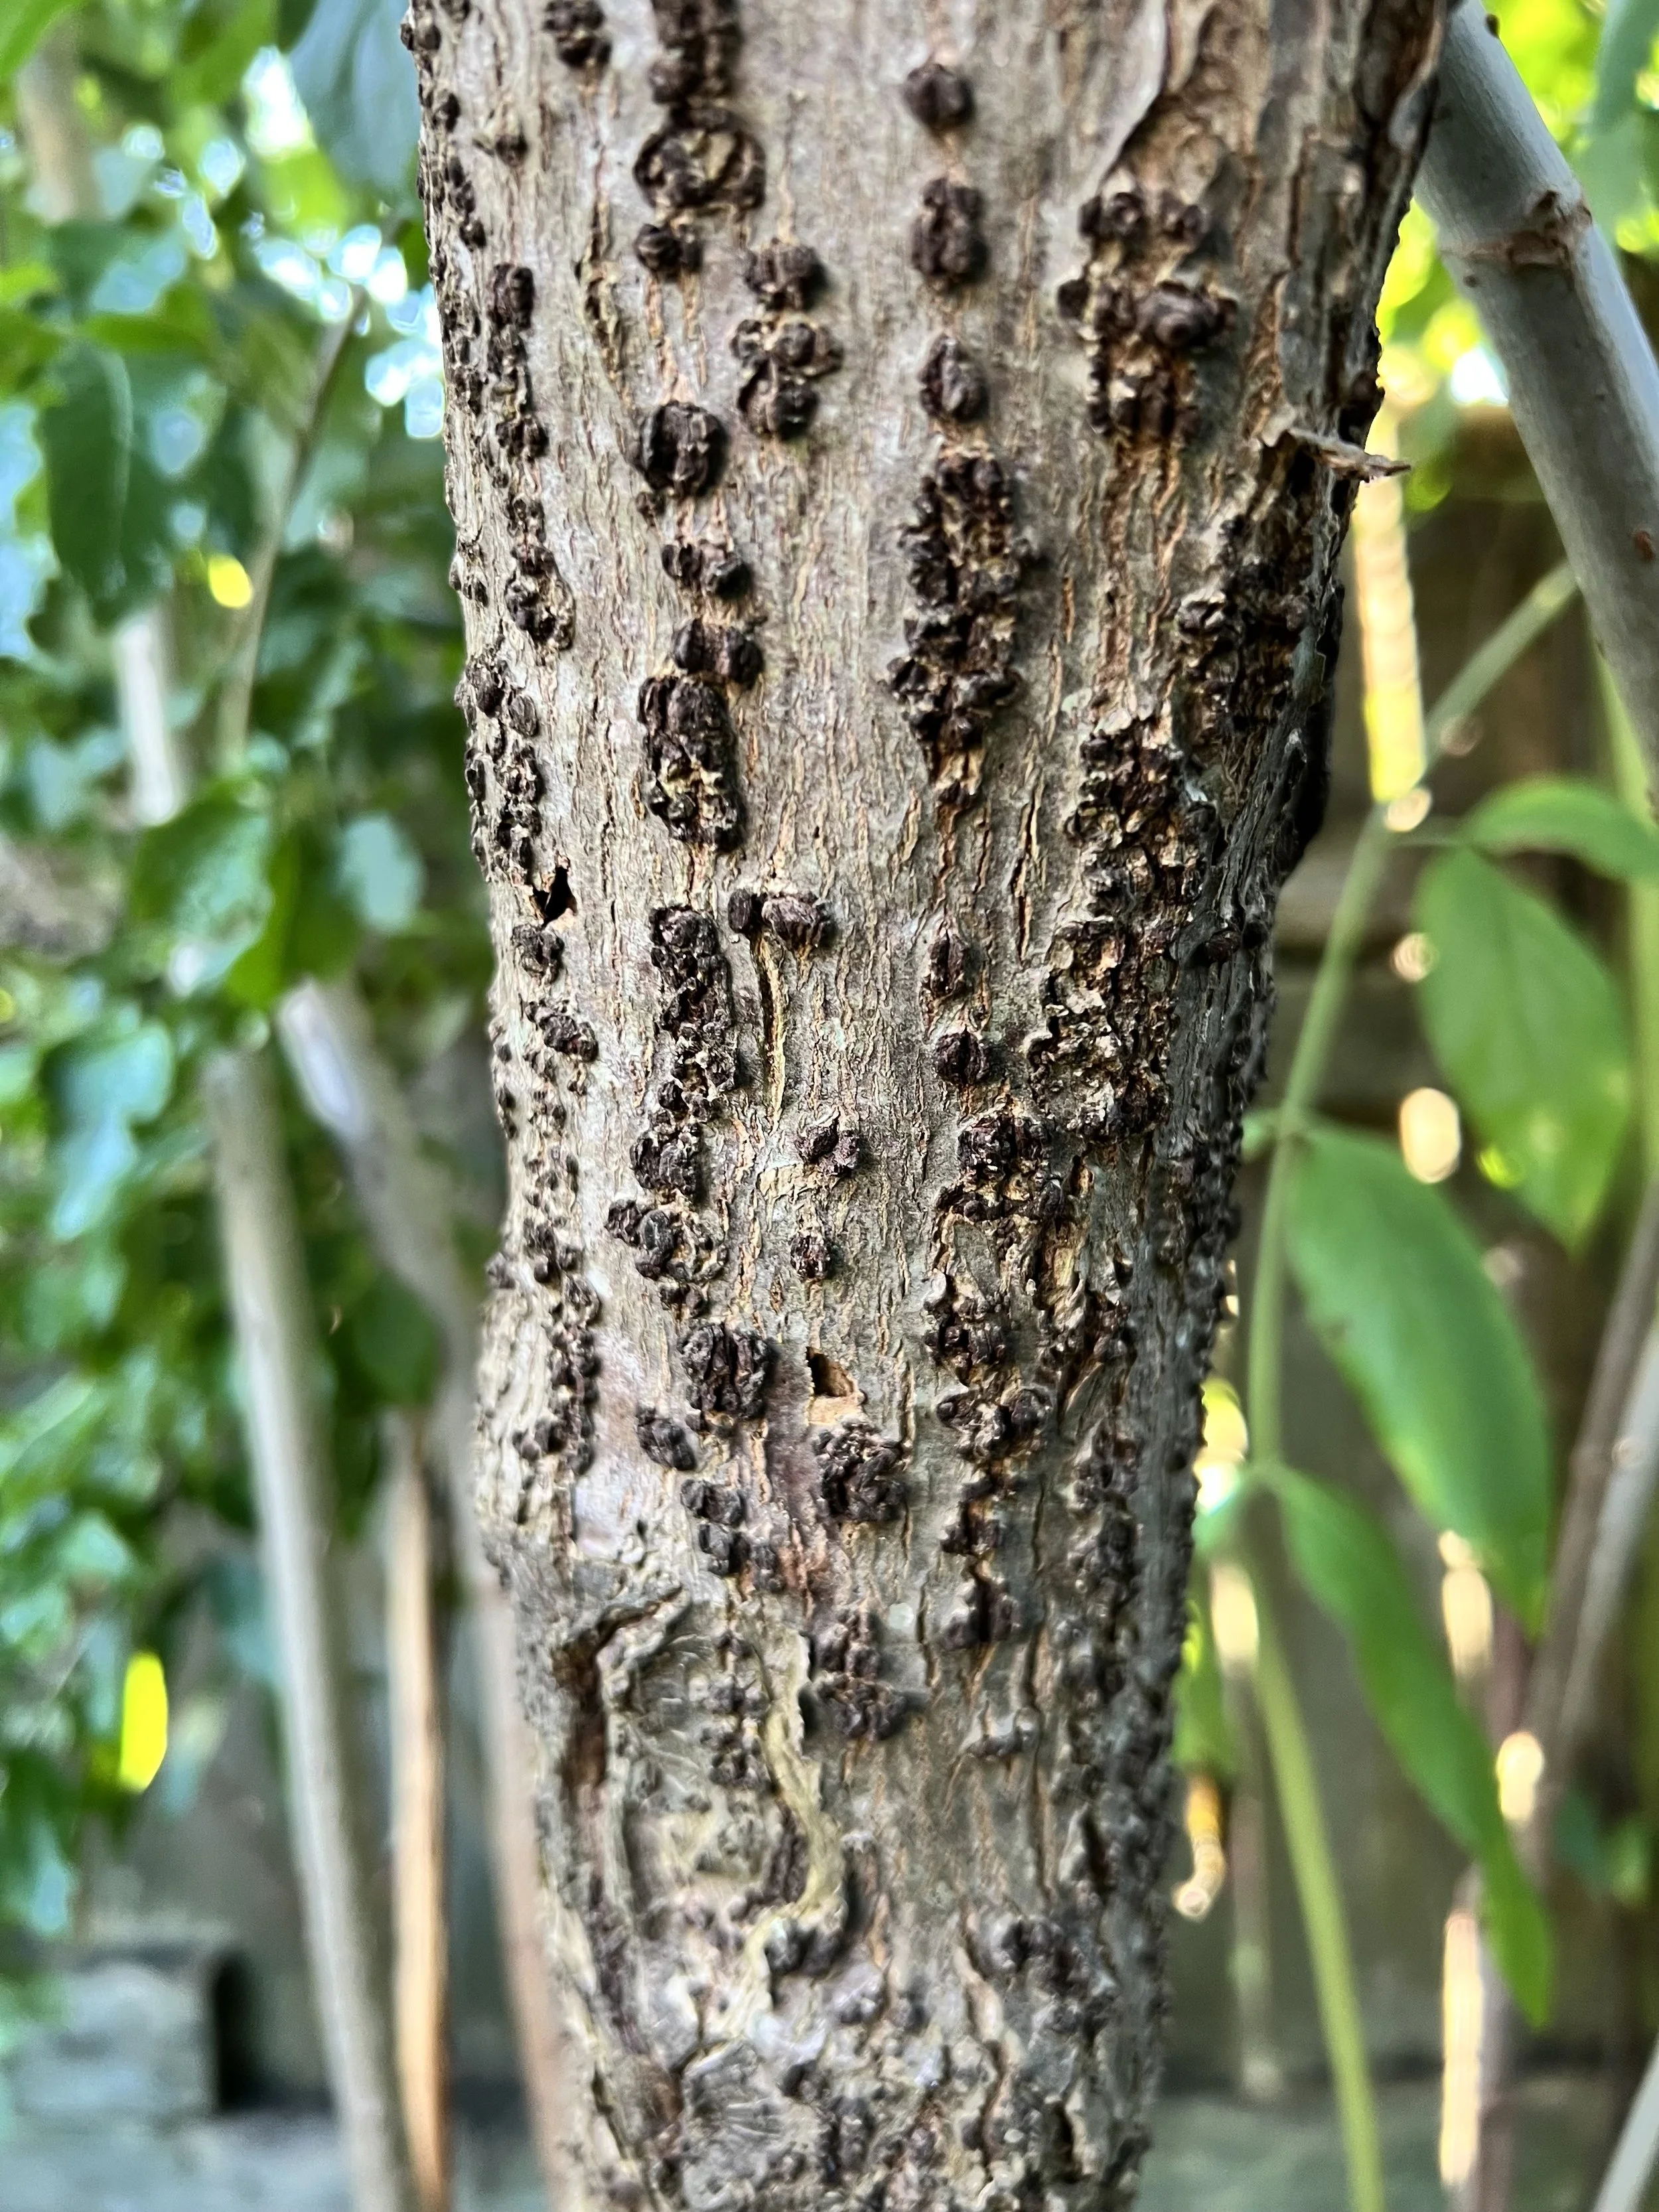
This is actually my favorite part of identifying elderberry because the science behind it is so fascinating. When I first started foraging, I did a deep dive into the bumps on the elderberry tree. I’m very interested in the reason for created things being the way they are. I don’t know. Maybe it makes me feel like I understand the mind of God a little better.
Those little corky bumps on the bark are called lenticels, and you’ll find them on elderberry stems of all ages. On younger stems they’re much smaller and smoother, sometimes just looking like tiny tan dots or short little lines. As the plant gets older and the bark thickens, the lenticels become much larger, rougher, and more pronounced. Obviously, this is an older tree because you can see just how developed they are.
The reason they’re there is because the living tissue beneath the bark still needs oxygen. As the bark matures, it becomes a much better protective barrier, but that also makes it harder for gases to move through it. Lenticels solve that problem by acting as tiny openings that allow oxygen to move into the stem while carbon dioxide moves back out. In other words, they’re part of the plant’s gas exchange system, helping the living cells beneath the bark continue to function.
I think it’s pretty incredible that something most people would probably walk right past is actually part of the tree’s respiratory system. It’s one of those details that makes me appreciate plants even more.
I would never identify elderberry from the bark alone because lots of woody plants have lenticels. But when I see these pronounced corky bumps together with the opposite compound leaves and those beautiful clusters of berries, it becomes another really strong clue that I’m looking at elderberry.
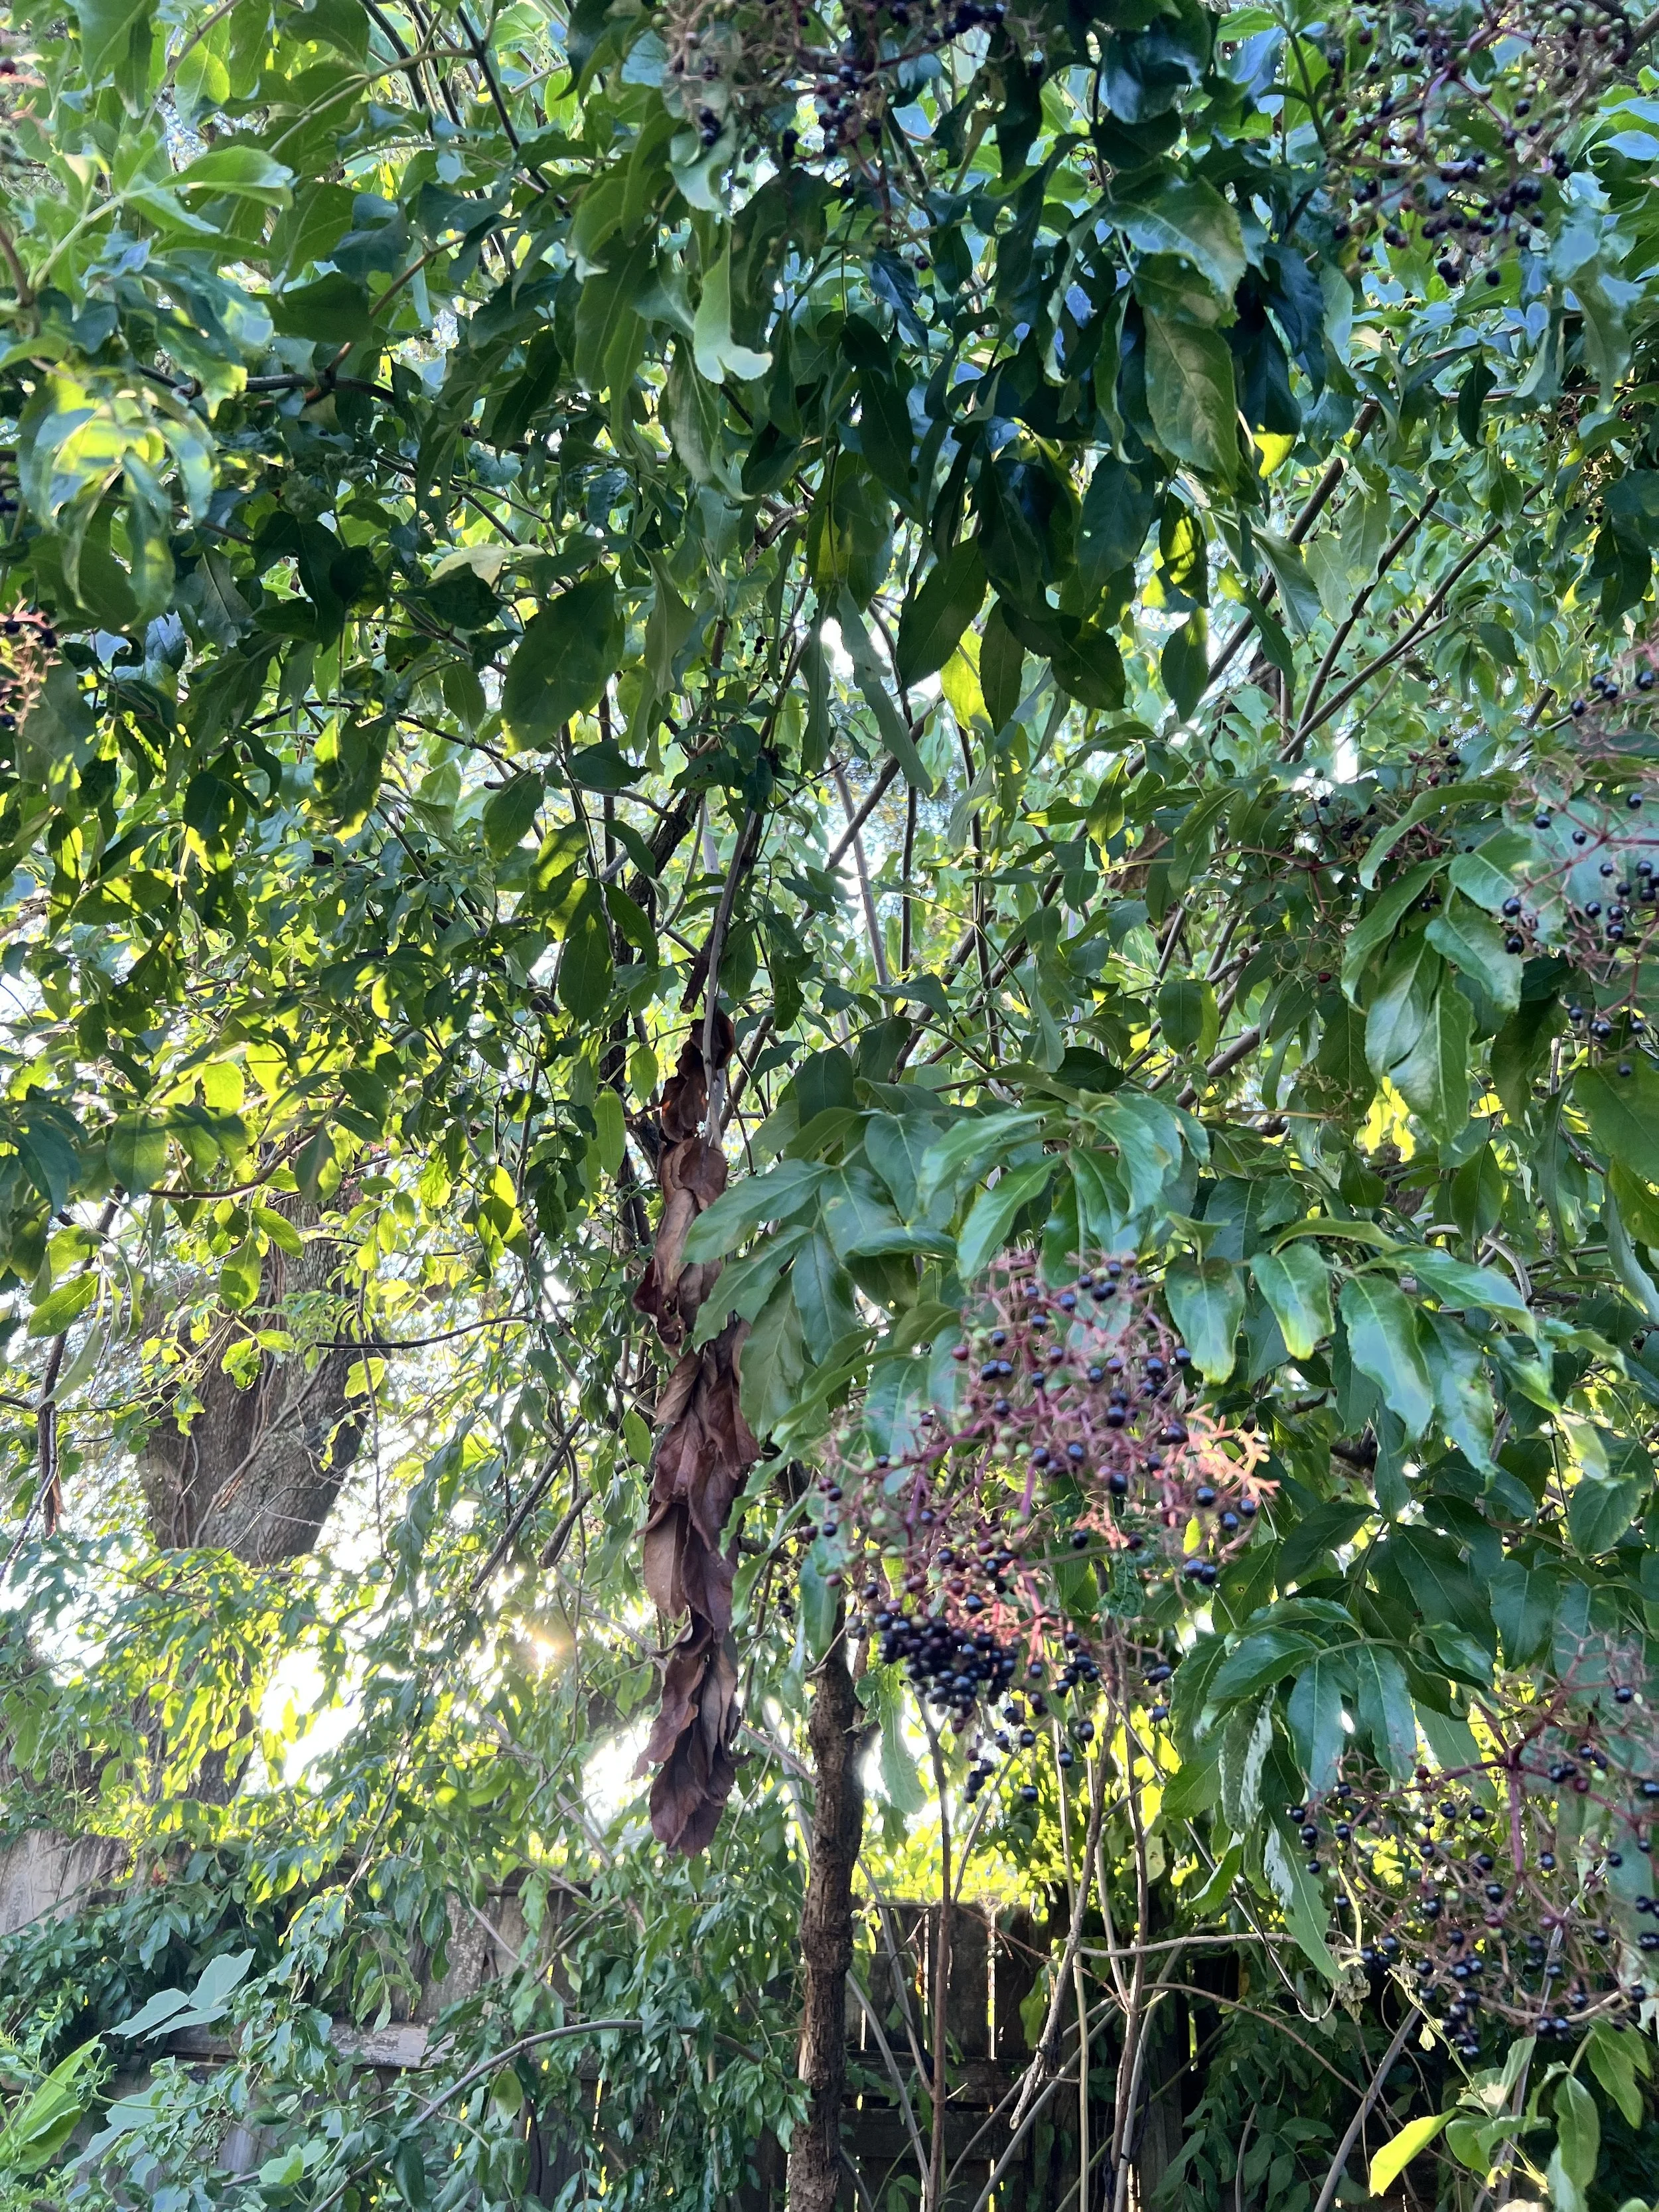
Here’s a look at the whole elderberry tree. One important note: don’t rely on just one feature to identify any wild plant. I always look at the leaves, bark, growth habit, stems, and berries together before I’m confident in an identification. Also remember that the leaves, stems, roots, and unripe berries shouldn’t be eaten. I only use the fully ripe berries after removing them from the stems. Even fully ripe berries should be cooked down before consumption.
Next I’ll show you the elderberry syrup recipe I make every year. It’s simple, tastes great, and has become a staple whenever any of my family members are sick.
Ingredients
1 cup dried elderberries (or about 2 cups fresh, destemmed berries)
4 cups water
1 cinnamon stick
1 teaspoon whole cloves
1 teaspoon fresh grated ginger (or ½ teaspoon dried)
1 cup raw local honey (added after cooling)
Directions
Place the elderberries, water, cinnamon, cloves, and ginger in a saucepan. Bring everything to a gentle boil, then reduce the heat and let it simmer for about 45 minutes to an hour, or until the liquid has reduced by about half.
Strain the berries and spices, pressing gently to extract as much liquid as possible. Let the mixture cool until it’s warm but no longer hot. Once it’s cooled, stir in the honey until it’s completely dissolved. Heating honey too much can damage some of the enzymes and beneficial compounds it naturally contains, which is why I always wait until the syrup has cooled before adding it.
Pour the finished syrup into a clean glass jar and store it in the refrigerator. It will usually keep for several months.
A Few Notes…
I always remove every berry from the stems before making syrup. The ripe berries are what I’m after, not the stems. I also don’t harvest every cluster I find. Birds and other wildlife depend on elderberries too, so I like to leave plenty behind.
I have plenty of plants I’d love to share so stay tuned for more foraging posts as we approach fall, which is my favorite foraging season.
Much love,
Melissa💛